Scheduled Live
This document is a machine-translated draft and is currently undergoing review. Some content may be inaccurate or differ from the original Korean version. For the most precise information, refer to the Korean documentation.
What is Scheduled Live?
Scheduled Live(File Live) is a feature that plays multiple pre-uploaded video files in a set order to implement Linear Streaming, just like a TV channel. You can easily configure a live channel and operate automated broadcasts within the Kollus Live console without any external encoder software (OBS Studio, vMix, etc.) or dedicated broadcast personnel.
The Scheduled Live feature is disabled by default. To activate this feature, contact your Account Manager(biz@catenoid.net). Once the feature is activated, the [Program] menu will be added to the left sidebar of the Kollus Live console.
Prerequisites
- Supported scope
- Only video file-based scheduled broadcasts are supported.
- Mixed scheduling that alternates between real-time streaming (Real Time Live) and video files is not supported.
Scheduled Live tutorial
Since Scheduled Live uses video files as its source, real-time automatic recording is not supported during broadcasts. The original files used in the broadcast are already stored in [Program] > [List of videos], so please use that data.
Step 1: sign in to Kollus Live console
Go to the Kollus Live console and sign in.
- Integrated account: Enter the account information provided at the time of service contract. If you are already using Kollus VOD, you can use the same sign-in credentials.
Step 2: create a Scheduled Live channel
Create a channel dedicated to Scheduled Live.
- Click Kollus Live console > [Channel] > [Channel list] > [Register channel] in the upper right corner.
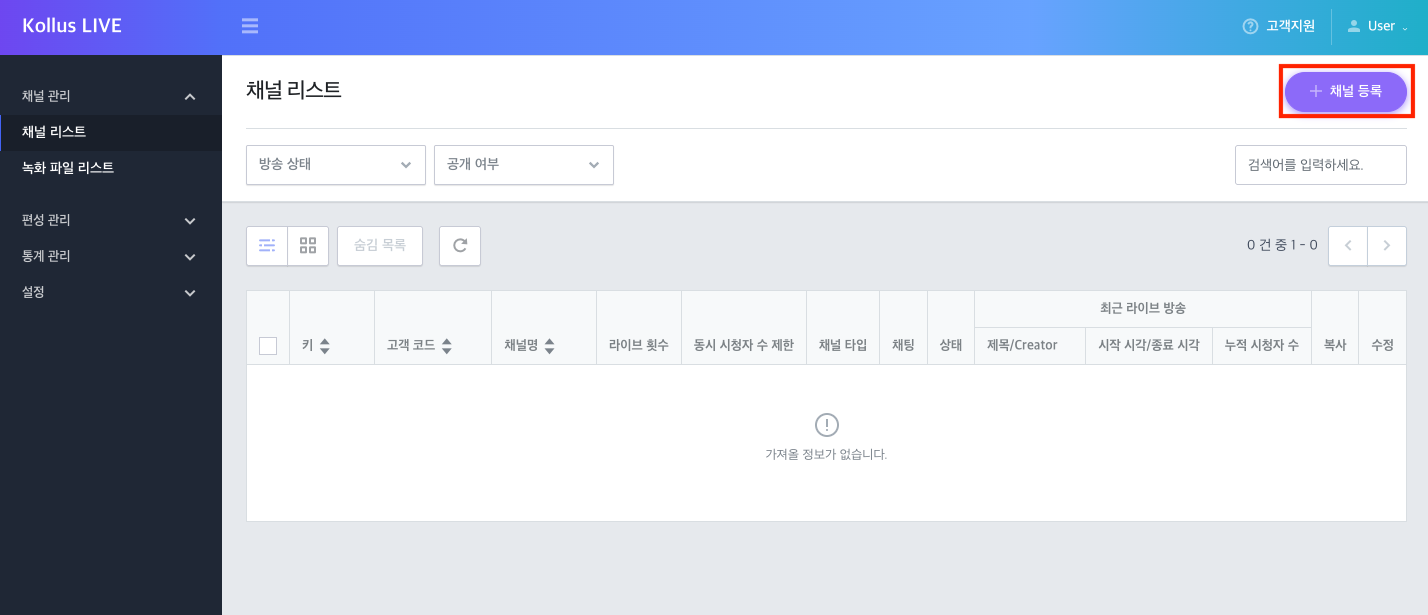
- Configure each item and click [Save]. For scheduled broadcasting, you must set [Type] to [Scheduled Live].
Item Description Key A unique identifier for the channel. This is a required value for generating the View URL, etc. (cannot be modified) Channel name The channel name displayed in the service. Used to identify the channel on the channel list or analytics pages. Customer code An identification code that the customer enters directly for internal management. Concurrent viewers limit Sets the maximum number of concurrent viewers who can access this channel. Type Select the live type. - [Live]: Standard real-time broadcast
- [Low Latency Live]: LL-HLS method that minimizes latency (Learn More: Low Latency Live (LL-HLS))
- [Scheduled Live]: File Live that broadcasts prepared VOD files at scheduled times
Encoding profile Sets the orientation (landscape/portrait) of the broadcast screen. - [Default - landscape]: Landscape orientation
- [Default - portrait]: Portrait orientation
Visibility Sets whether the channel is public or private. - [Public]: A View URL (Video Gateway Link) for external distribution is provided.
- [Private]: A JWT (JSON Web Token)-based URL must be generated so that only authorized users can watch.
Learn MoreFor details on security and other advanced settings beyond the basic items listed in the table above, refer to the documents below.
Step 3: upload content
Upload the content to be used for Scheduled Live to Kollus storage.
- Click Kollus Live console > [Program] > [List of videos] > [Content upload] in the upper right corner.

- Before selecting a file, decide whether to enable transcoding. For details, refer to the Transcoding Options section.
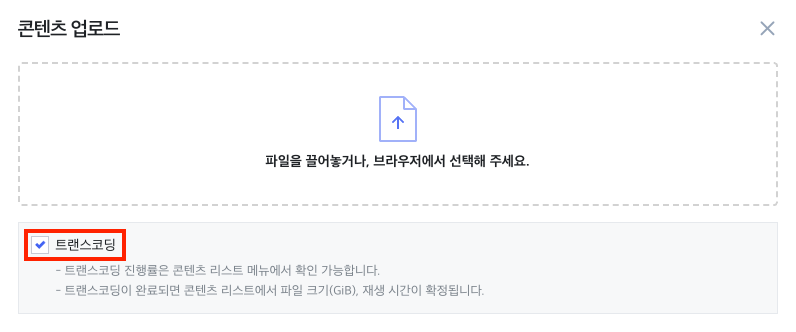
- Drag and drop files into the upload area, or click the upload area to select files.
- Emoji restriction: Files cannot be uploaded if the file name contains emojis.
- Supported File Extensions: Only the extensions below can be uploaded. Files with unsupported extensions may be excluded from the upload list or fail.
- Video:
.asf,.avi,.dv,.webm,.m4v,.mov,.mp4,.mkv,.mpeg,.wmv,.ogm,.ogv
- Video:
- Once the upload is complete, the content will be added to the list. If transcoding is enabled, the system will automatically start transcoding.
- Once all tasks are complete, you can use the content for Scheduled Live streams from [Program] > [Scheduling].
Transcoding options
Transcoding is an essential process that converts the original video to various resolutions and bitrates optimized for different viewing environments. Depending on whether transcoding is enabled at the time of upload, the broadcast method and recommended specifications differ.
A. enable transcoding (recommended)
Automatically converts the uploaded video to a standard format optimized for Scheduled Live stream specifications. This is the most recommended method that can ensure broadcast stability even when scheduling multiple original files with different specifications.
- Resolution: Maintains the aspect ratio of the original video
- Frame rate: Fixed at 30fps
- Audio sample rate: Fixed at 48kHz
B. disable transcoding (passthrough method)
Uses the original file specifications as-is as the broadcast source without any conversion process. This can reduce encoding time, but if the file deviates from the recommended specifications, audio-video sync issues may occur. Always verify that playback works correctly on a test channel before the actual broadcast.
- Frame rate: 30fps recommended
- Audio sample rate: 48kHz recommended
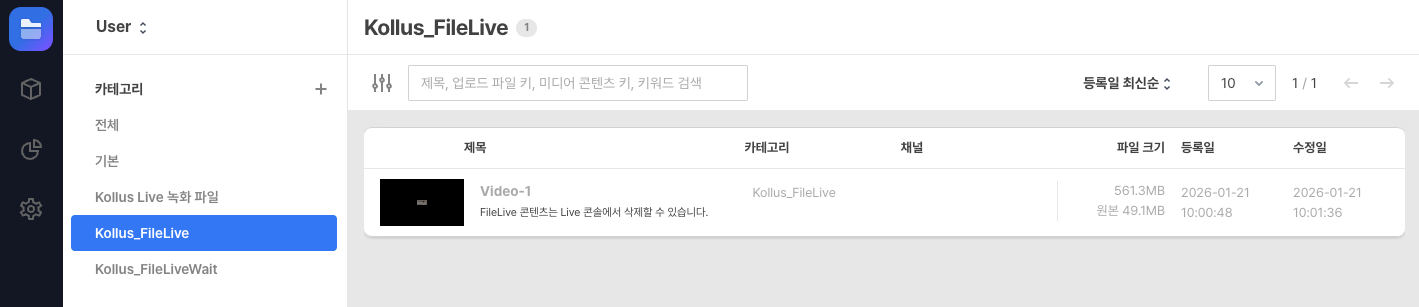
- Auto-sync: Uploaded content is automatically registered in the Kollus VOD console > [Library] > [Kollus_FileLive] category.
- Modification restrictions: Files created in that category cannot be modified or deleted from the Kollus VOD console; they must be managed from Kollus Live console > [Program] > [List of videos].
- Source separation: Content uploaded to the Kollus VOD console cannot be used for Scheduled Live. You must upload new content from Kollus Live console > [Program] > [List of videos].
Step 4: upload idle screen(standby image)
Prepare idle screen (standby) images to deliver guidance messages to viewers or display brand images before the broadcast begins.
Recommended image specifications
- Supported formats: jpg, png
- Recommended resolution: 4096×2160 px or less (landscape recommended)
- Transcoding: Automatically applied upon upload without exception
- Click Kollus Live console > [Program] > [List of idle screens] > [Idle screen upload] in the upper right corner.
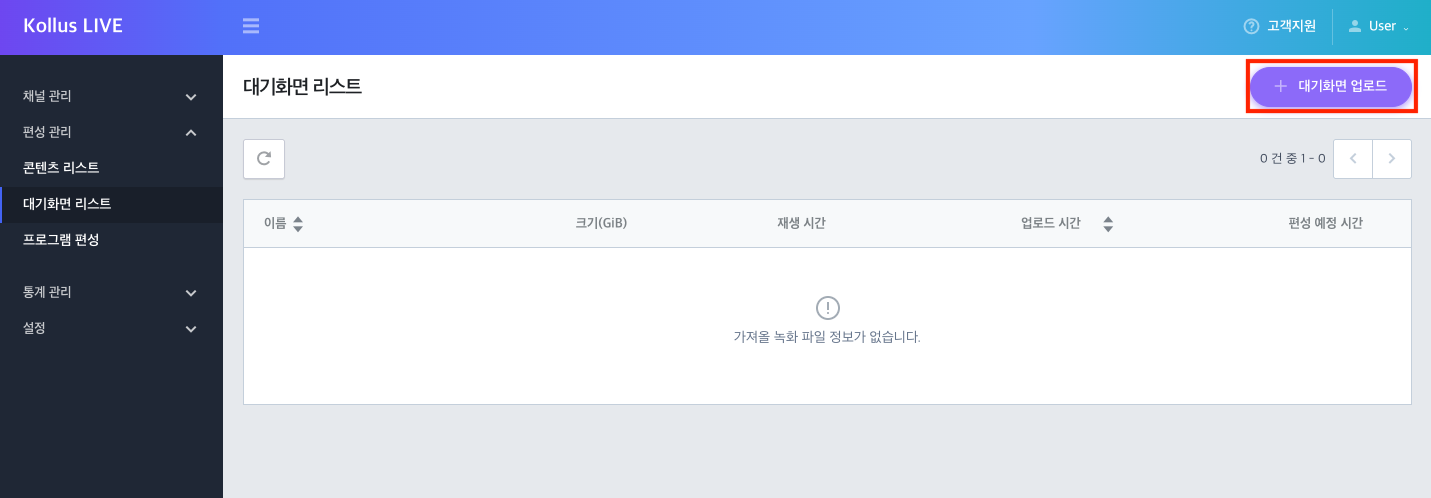
- Drag and drop the image into the upload area, or click the upload area to select a file.
- Once the upload is complete, the system will immediately start transcoding.
- Once all tasks are complete, you can use it for Scheduled Live streams from [Program] > [Scheduling].
Step 5: scheduling
You can configure seamless linear broadcasting by placing multiple programs consecutively on a single channel.
Programs scheduled on the same channel share the same Video Gateway Link. However, when a preceding broadcast ends and the next broadcast begins, viewers must refresh the player page to see the updated broadcast stream.
Scheduling procedure
- Go to Kollus Live console > [Program] > [Scheduling].
- Select content from the content list on the left and drag and drop it to the desired date on the calendar, or click [Scheduling] in the upper right corner.
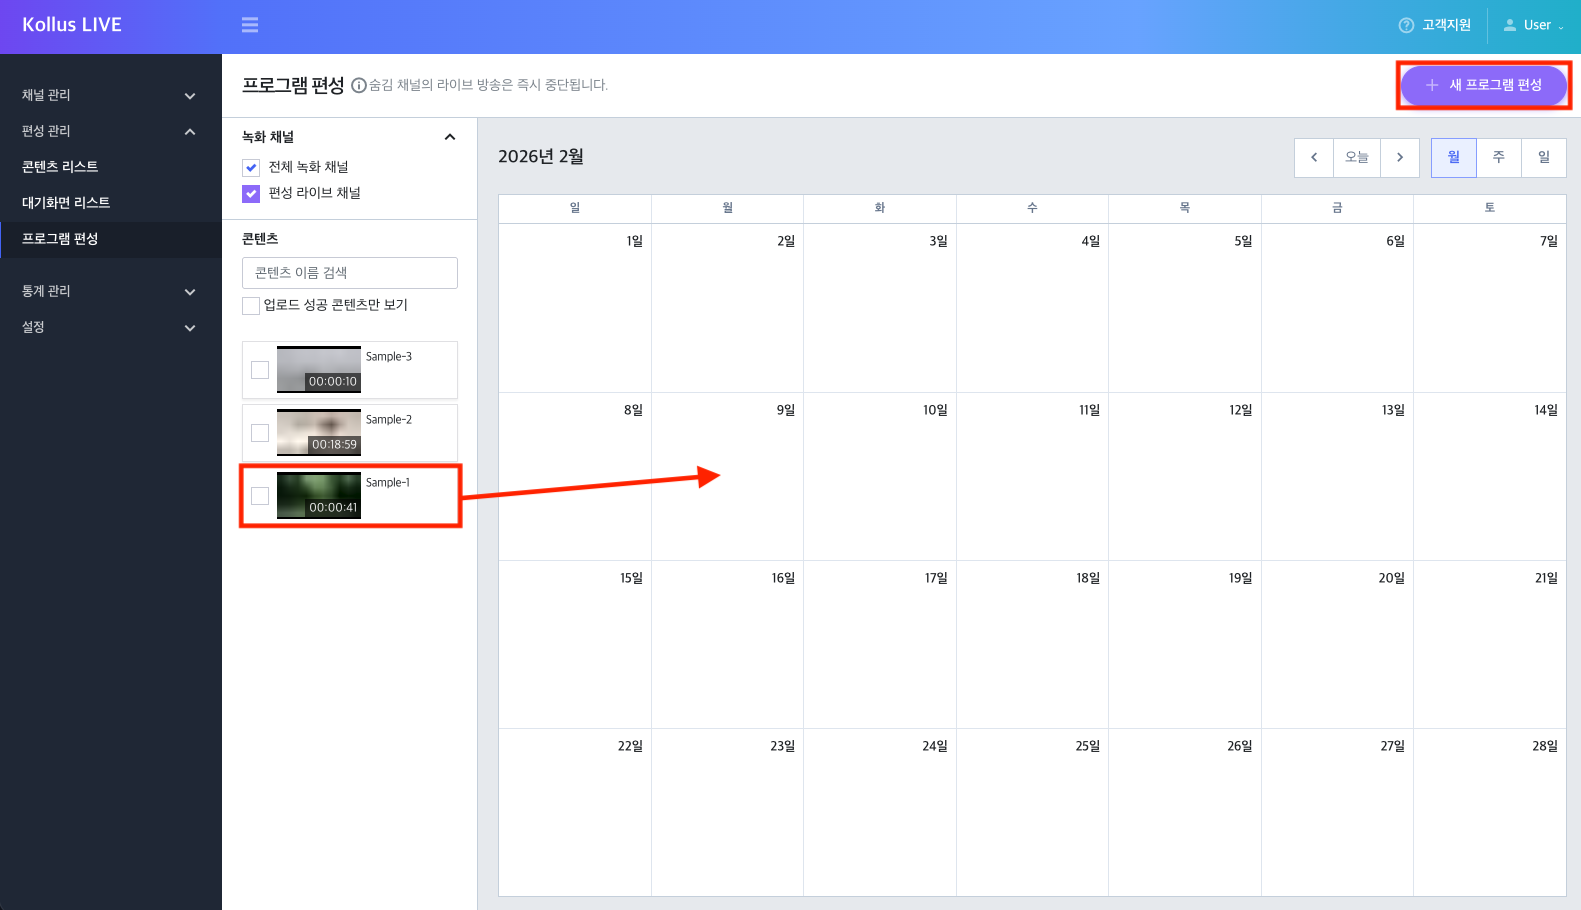
- Enter the details in the popup window.
Item Description Program title The name of the program to be displayed on the broadcast list or schedule. Channel Select the channel to broadcast on. (Only Scheduled Live-dedicated channels can be selected) Idle screen Select the image to be displayed to viewers before the broadcast starts. Idle screen duration The duration the idle screen(standby image) is maintained before the broadcast starts. (Maximum 360 minutes, included in the total stream time) Content Select the videos to broadcast. Multiple videos can be scheduled sequentially, but the audio codec and sample rate of all videos must be identical. Total stream time The sum of the idle screen(standby image) duration and the total length of all content is automatically calculated. Broadcast start date Sets the time when the actual broadcast starts. (End time is automatically calculated) - Example: To start a broadcast at 14:00 after displaying an idle screen(standby image) for 5 minutes, set the time to 13:55.
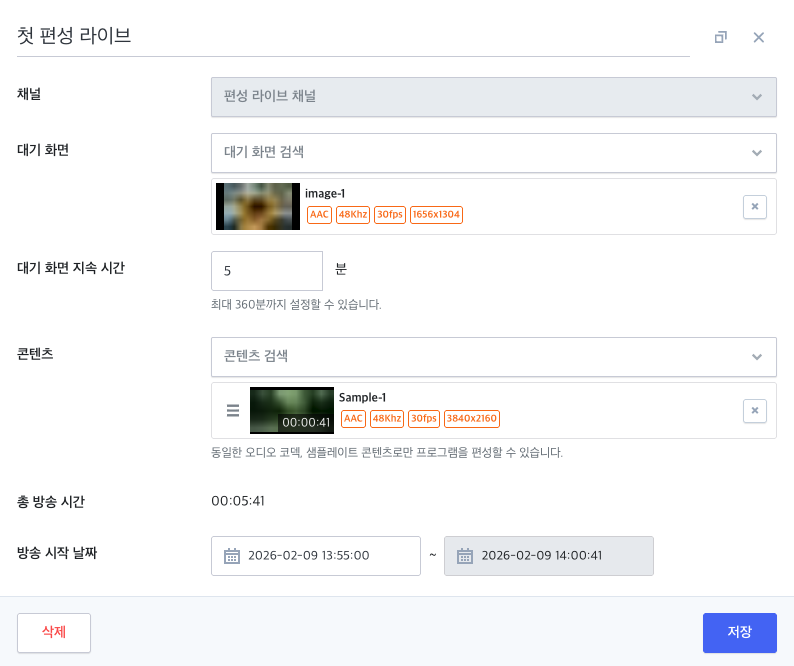
- After completing the settings, click [Save].
broadcast schedule management (duplicate/edit/delete)
Registered schedules can be intuitively managed through the calendar interface.
- Edit
- You can easily move a schedule to another date by dragging it on the calendar.
- You can change the details in the popup window that appears when you click on a schedule.

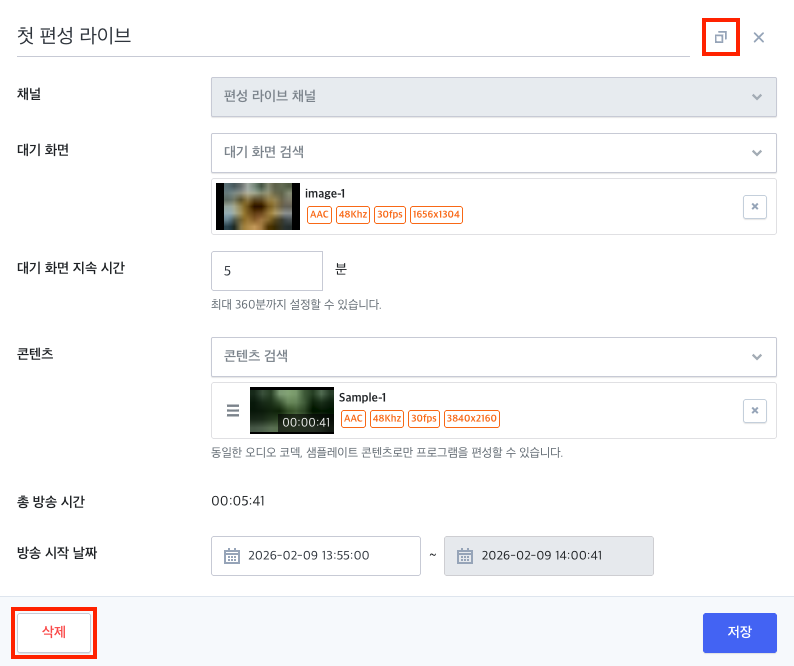
- Duplicate: Select a schedule and click the copy icon at the top of the popup to quickly create a copy.
- Delete: Select a schedule and click [Delete] at the bottom of the popup to cancel the scheduled broadcast.
Step 6: check the View URL
Once all scheduling is complete, check the broadcast address to share with viewers and prepare to deploy it on your website.
View URL
Scheduled Live channels provide URLs in the same way as regular live channels. Refer to the document below for instructions on how to check.