Player Skins
Notice
This document is a machine-translated draft and is currently undergoing review. Some content may be inaccurate or differ from the original Korean version. For the most precise information, refer to the Korean documentation.
- PlanEnterprise
In the Kollus VOD console, you can freely change the player UI colors to match your brand identity. In addition to the built-in preset skins, set up your own custom skin on a per-channel basis to strengthen the consistency of your service.
Note
- Supported environment: This feature is available only for standard(unencrypted) content and HTML5 Player for PC. (This feature will also become available on Kollus Web Player through a future update.)
- Account permissions: Trial accounts have restricted access to adding and editing player skins.
Built-in preset skins
Four preset skins are provided that can be applied instantly without any additional configuration.
- Pink Violet
- Brown Stone
- Nature Green
- Red Face
How to Customize Player Skins
Step 1: Create a custom skin
- In the Kollus VOD console, click [Settings] > [Player] > [Skin] tab > [Add Skin].
- Check the preview while configuring the details, then click [Save].
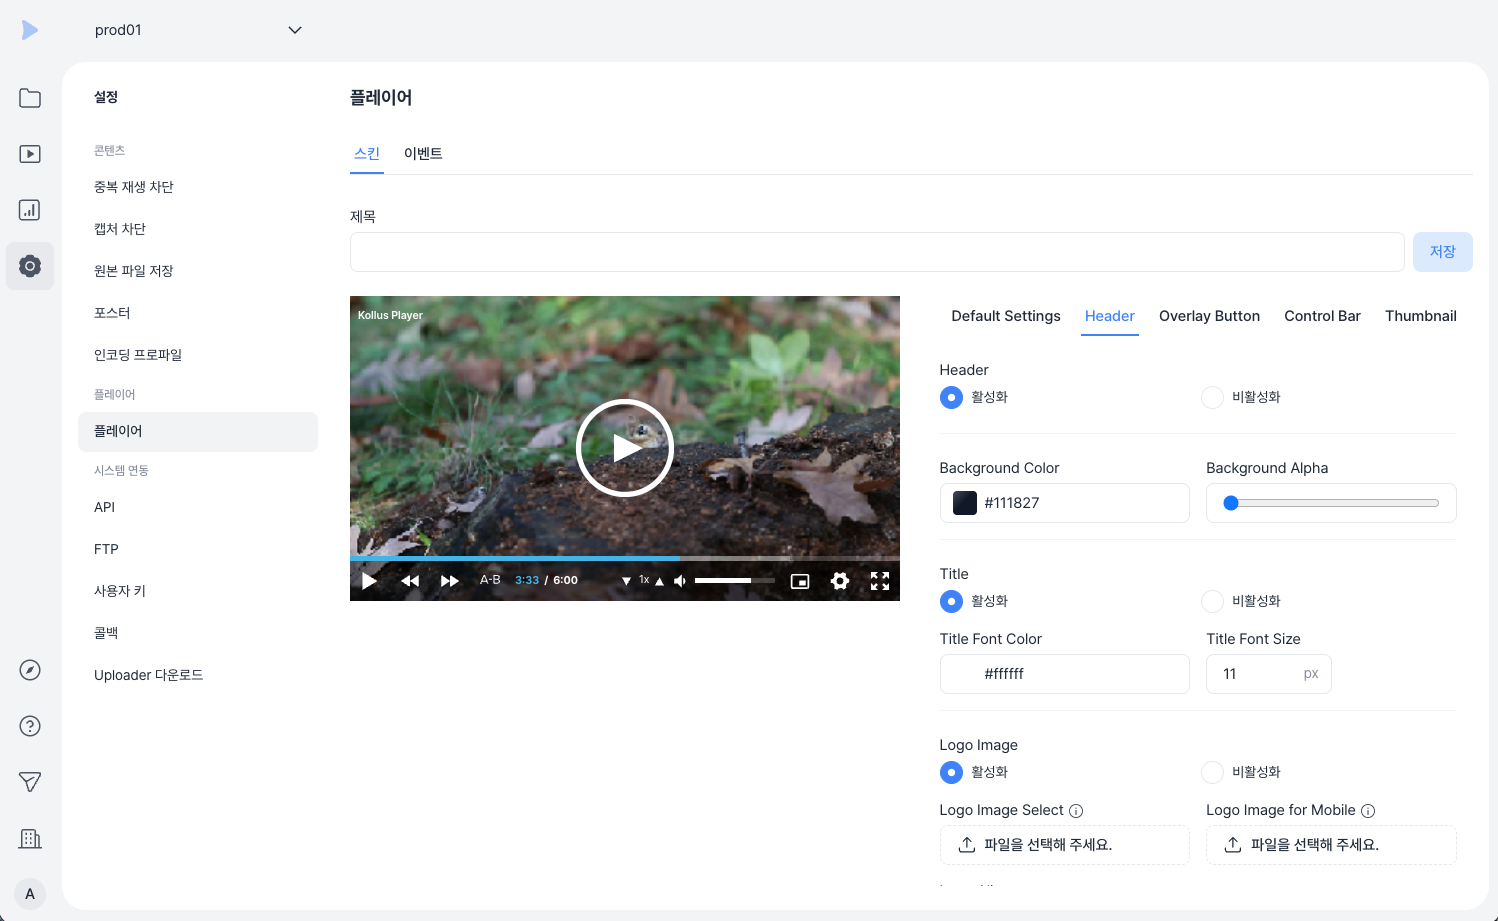
Step 2: Apply the skin to a channel
- In the Kollus VOD console, click [Channel] > [More (⋮)] to the right of the target channel > [Player Settings].
- Select a skin under [Player Skin], then click [Save].
Edit a skin
- In the Kollus VOD console, go to [Settings] > [Player] > [Skin] tab and click the edit icon to the right of the target skin.
- After completing your edits, click [Save]. The changes will be applied immediately to any channel currently using that skin.