Quickstart: Upload & Play Content
This document is a machine-translated draft and is currently undergoing review. Some content may be inaccurate or differ from the original Korean version. For the most precise information, refer to the Korean documentation.
This guide is for customers who are adopting the Kollus VOD service for the first time. It explains, step by step, how to upload standard(unencrypted) content and complete test playback via a share link.
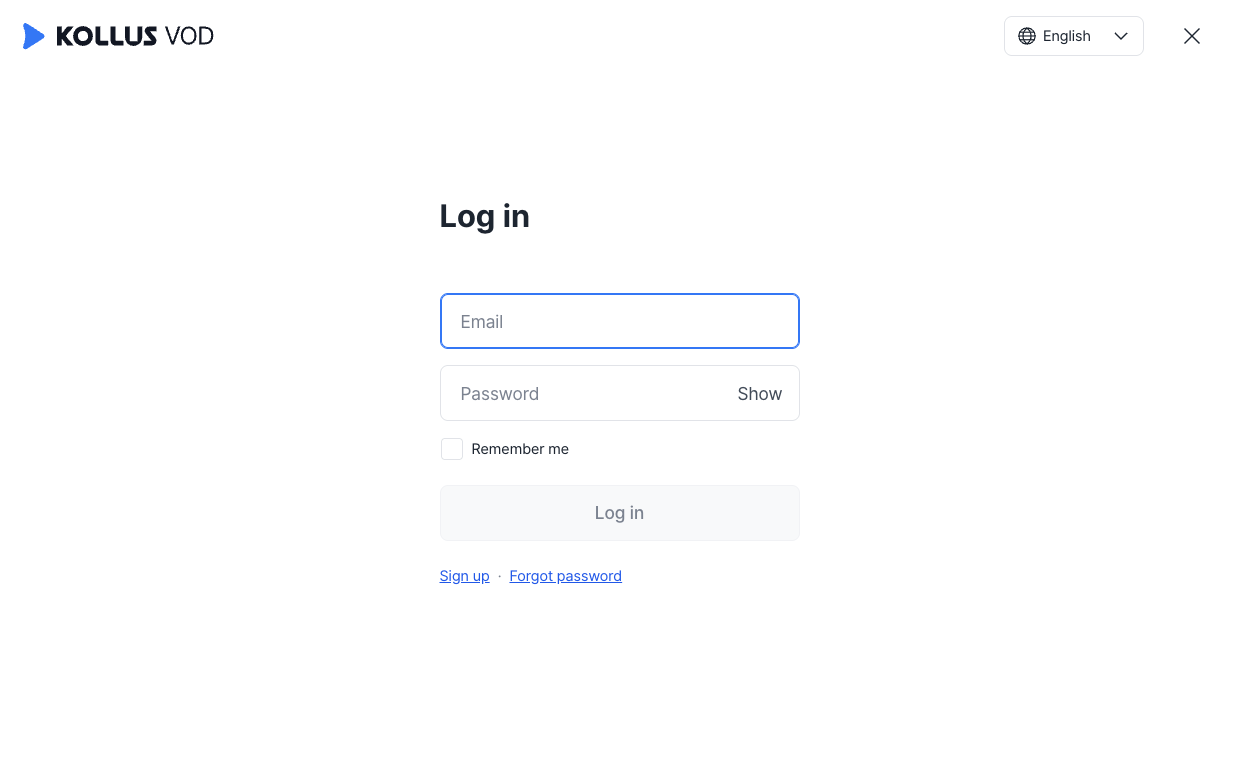
Step 1: Sign in to the Kollus VOD console
Access the Kollus VOD console and sign in.
New users should refer to the Create a Sign-in account document to create an account first.
Step 2: Upload and transcode content
Upload and manage content files from the [Library] menu.
-
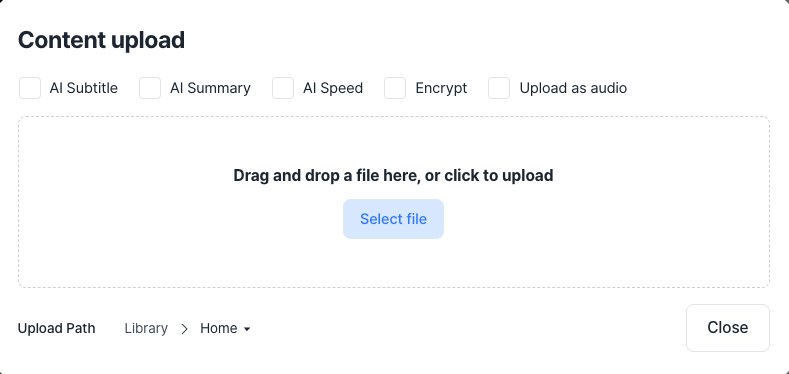
From the left menu, select [Library], then click [Content upload].
Automatic AI Subtitle activation for Starter & Basic plansFor Starter and Basic plans, the AI Subtitle generation option is enabled by default when uploading content. Therefore, a language selection window for subtitle generation appears before you select a file. Set the default language used in the content, the Subtitle types, and whether the subtitle is public, then click [Confirm].
-
Drag and drop files into the upload area, or click [Select file].
- Upload options: This guide proceeds with the upload without configuring any additional options. For details on each option, refer to the Console Upload - Step 2: Configure Upload Options and Upload Files document.
- File name emoji restriction: Files whose names contain emojis cannot be uploaded.
- Supported file extensions: Only files with the following extensions can be uploaded. Unsupported file formats are automatically excluded from the upload list or fail to upload.
- Video:
.3gp,.asf,.avi,.dv,.flv,.webm,.m4v,.mov,.mp4,.mpeg,.mpg,.wmv,.3g2,.3gpp,.f4v,.m2v,.ogm,.ogv,.wm - Audio:
.aac,.flac,.m4a,.mp3,.ogg,.wav,.amr,.wma
- Video:
- Maximum number of uploads: You can select up to 20 files at a time.
-
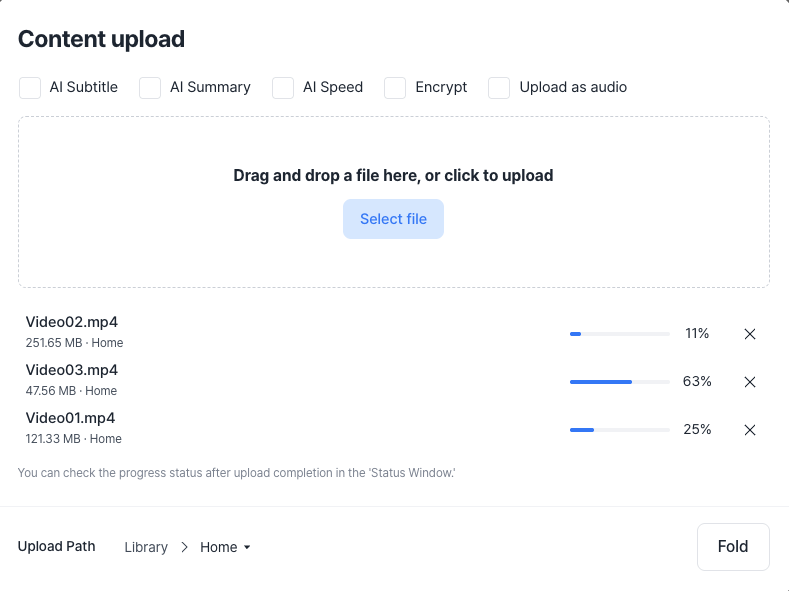
After selecting files, check the upload progress at the bottom.
-
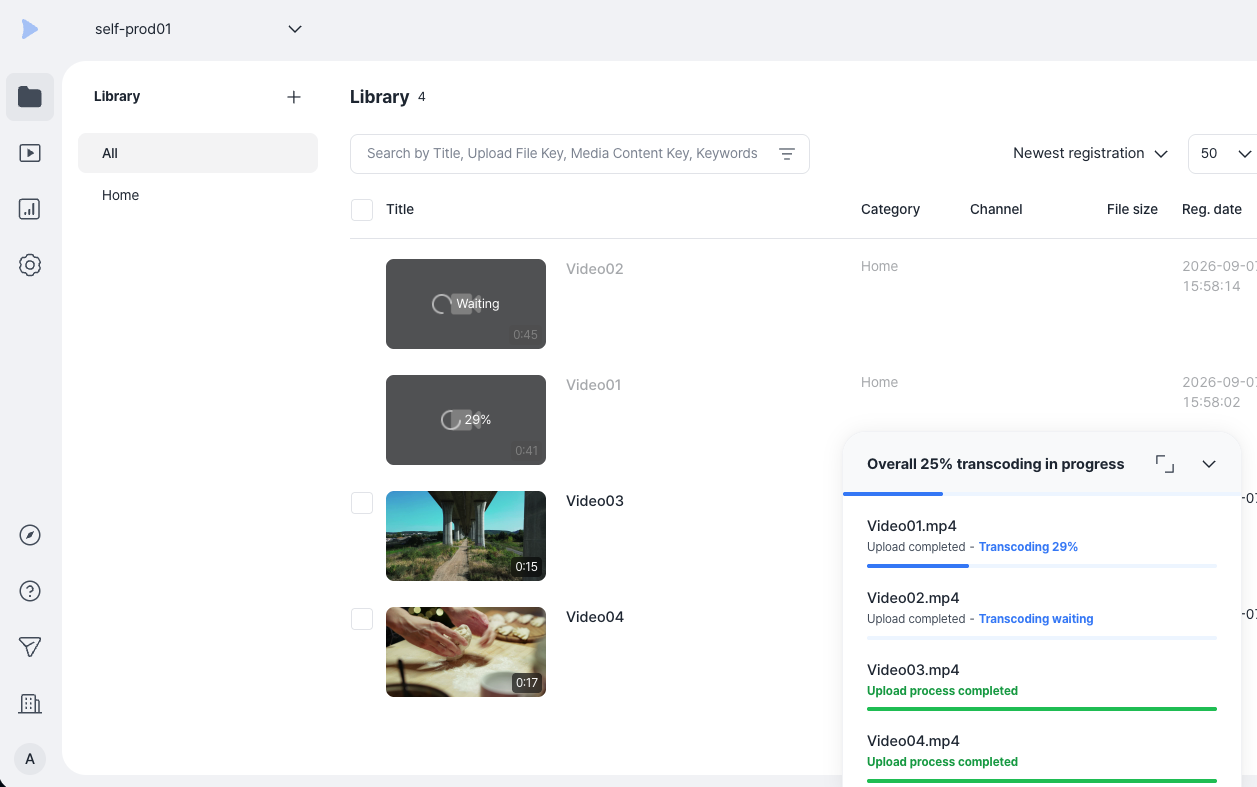
Once the upload is complete, the system automatically starts transcoding.
- Transcoding: An essential process that converts the original video into resolutions and bitrates optimized for various viewing environments.
- Progress status: You can check progress via the percentage (%) shown on the content poster.
Step 3: Create a distribution channel
To provide content to users, you need a distribution channel. A channel is the basic unit of content distribution, and you can configure independent security and playback policies for each channel.
- Automatic default channel creation: One default channel is automatically created when a workspace is created.
- No additional channels: You cannot create additional channels beyond the default channel.
-
From the left menu, select [Channel], then click [Add channel].
-
Configure the settings referring to the descriptions below, then click [Save]. Since this guide is for test playback purposes, select [Use as shared channel].
Channel settings- [Use as shared channel]: Provides a URL and embed code for external distribution
- [Use as encrypted content-only channel] Enterprise : For content with Kollus DRM applied only (see: Content Encryption (DRM))
Delivery method (⚠️ Encrypted content-only channels support only the Progressive Download method.)
- [Progressive Download] Enterprise : Sequential download method (for low-spec environments)
- [HLS]: Automatically optimizes video quality based on network conditions
- [HLS (AES-128)] Basic Enterprise : Enhanced security (adds an AES-128 encryption layer)
- [Block playback when manipulating video watermark] Enterprise : Immediately blocks playback when watermark tampering is detected
Step 4: Register content
Register the uploaded content to the created channel.
Uploaded and transcoded content is automatically registered to the default channel.
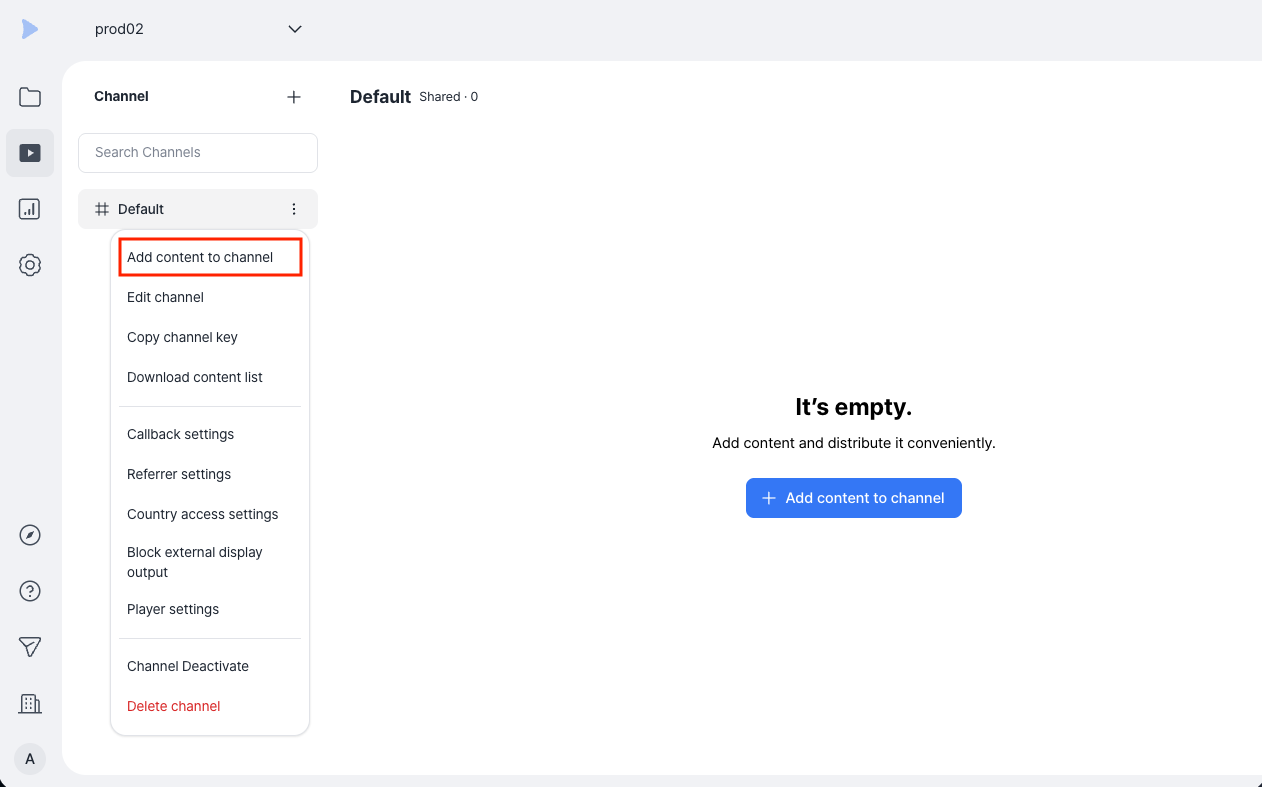
- Click [More (⋮)] to the right of the target channel > [Add content to channel].
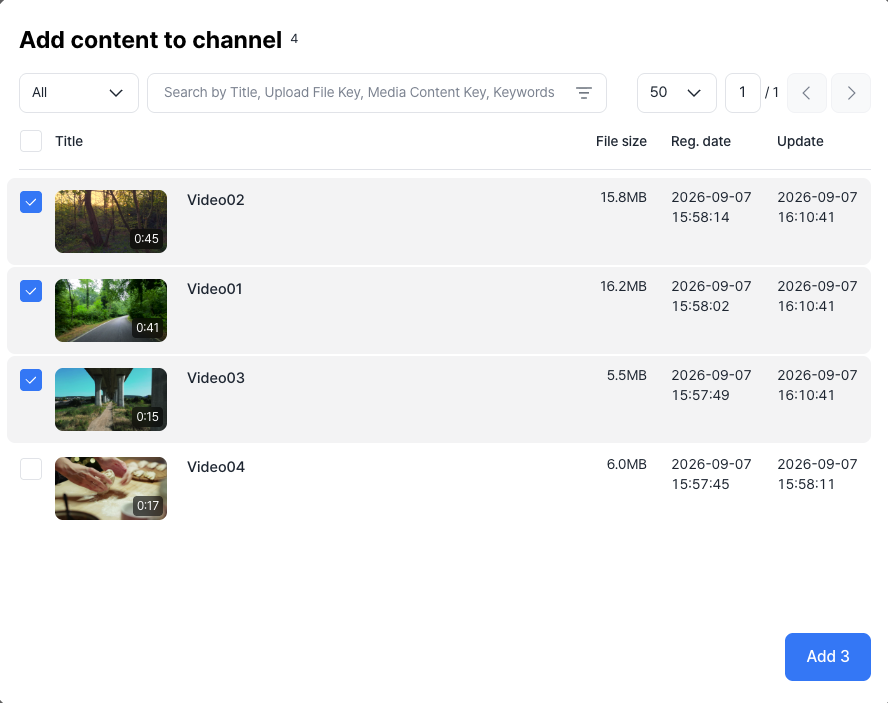
- Select the content to register, then click [Add].
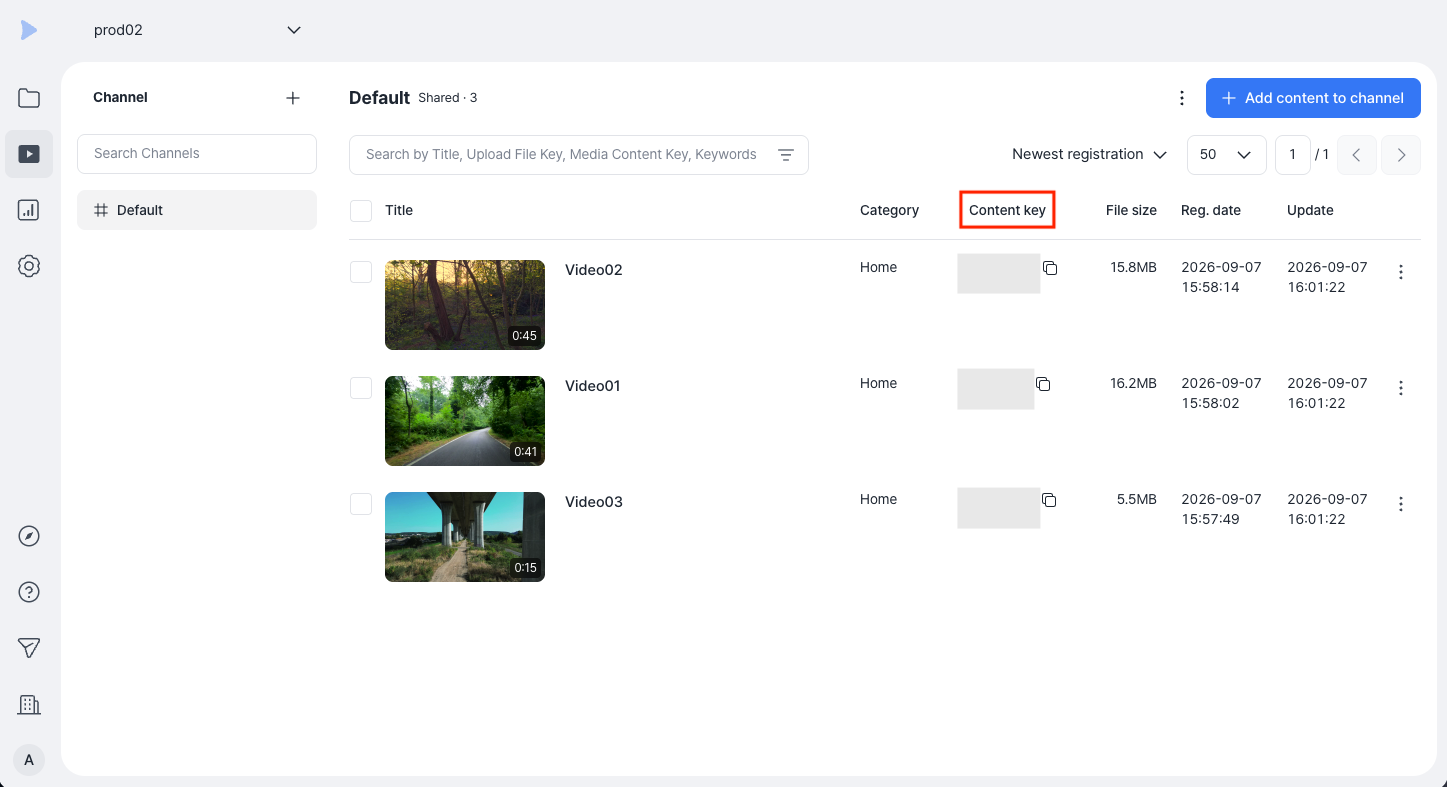
- Once registration is complete, a unique media content key is issued for each content item. This key serves as the content distribution identifier for each channel.
Step 5: Check and test the playback URL
Distribution preparation is complete. Check the information needed for actual playback and test it.
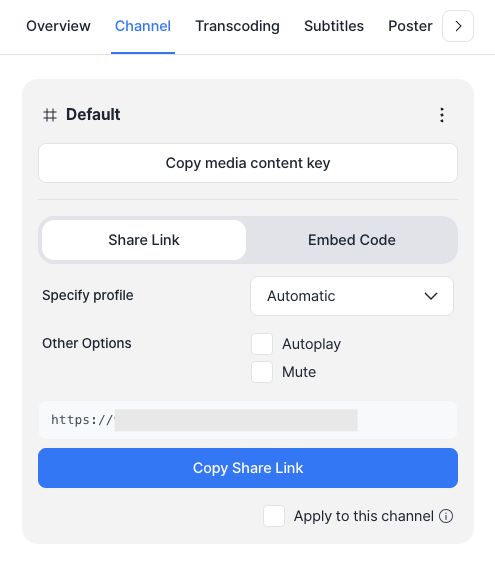
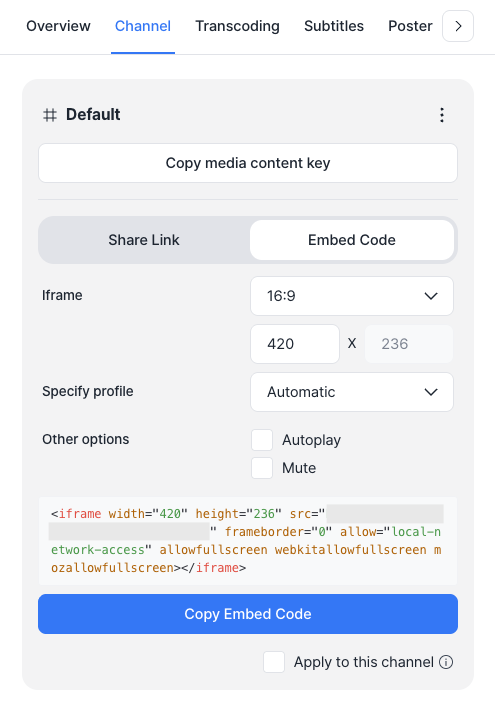
- From [Channel] > Select channel > Content list, click the title of the content.
- In the [Channel] tab, copy the share link and enter it into your browser's address bar. To embed the video in a web page, copy the embed code from the [Embed code] tab.
Step 6: Check player features
Kollus Player provides the following standard features for a seamless viewing experience. Check the full list of features on the Kollus Player Features page.
- Playback speed control: Supports 0.5x–2x speed
- Seek function: 10-second skip and loop section
- Convenience features: Supports PIP (Picture-in-Picture) mode