Console
This document is a machine-translated draft and is currently undergoing review. Some content may be inaccurate or differ from the original Korean version. For the most precise information, refer to the Korean documentation.
- PlanStarterBasicEnterprise
※ Availability varies by plan. Unless otherwise noted, all plans support this feature.
Upload content easily through a cloud-based web console, with no separate software installation required.
Step 1: Access the Kollus VOD console
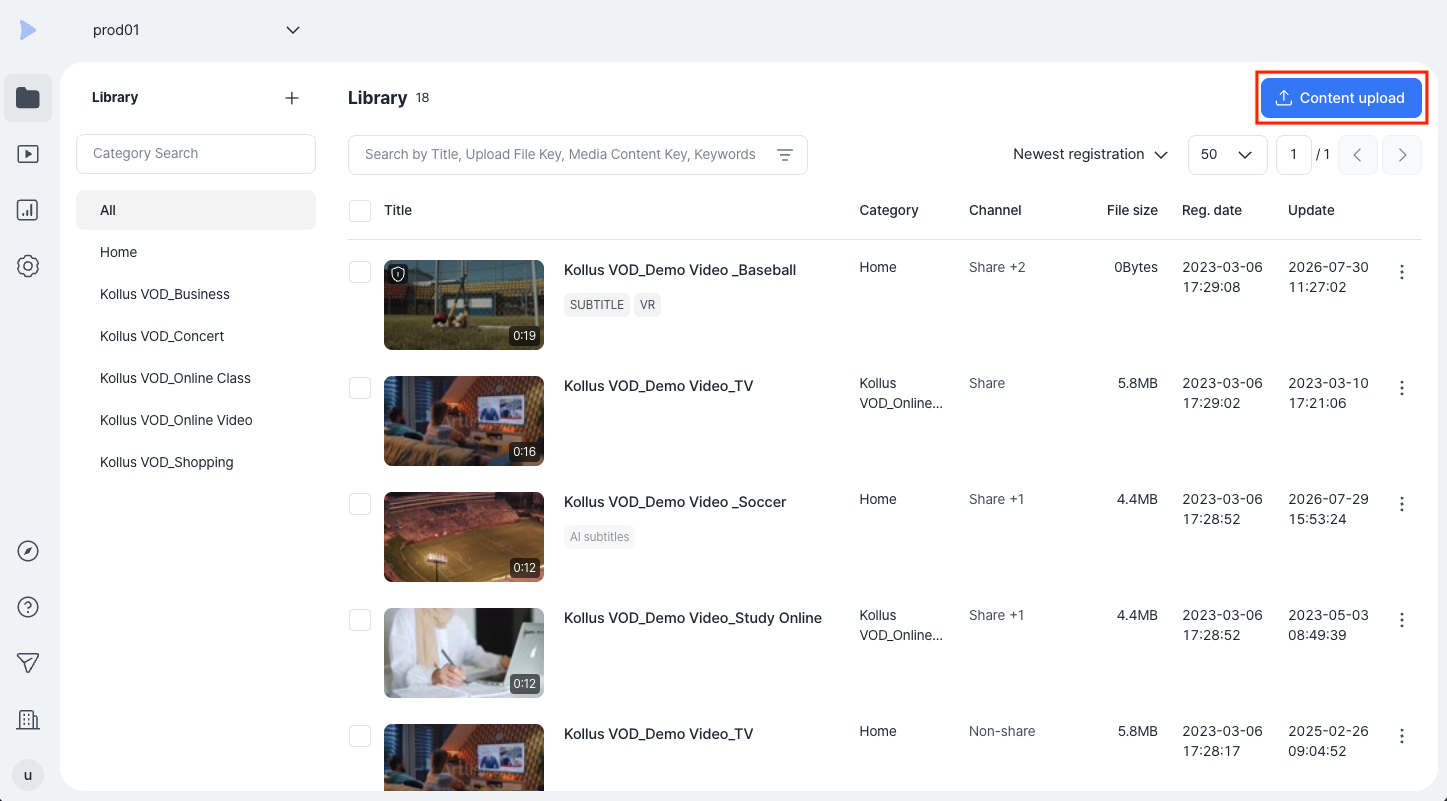
Sign in to the Kollus VOD console, then click [Content upload] at the top right of the [Library] screen.
Step 2: Configure upload options and upload files
When the upload window opens, configure the options and select files according to the following procedure. Before uploading files, it is recommended to set up the categories for content classification in advance. (See: Create a new category)
-
(Optional) Select the upload options.
Notes by plan-
Starter
Basic
- Auto-enable AI Subtitle: When uploading content, the AI Subtitle generation option is enabled by default. Therefore, a language selection window for subtitle generation appears before you select a file. Set the primary language used in the content, the Subtitle types, and whether the subtitle is public, then click [Confirm].
-
Enterprise
- Enable upload options: The AI Speed, encryption, and upload as audio options are enabled by contacting your Account Manager.
- Auto-apply FTP options: The console upload does not support the preset (saved settings) feature. To repeatedly and automatically apply the same upload options, use the FTP upload method.
- AI Subtitle: Analyzes audio to automatically generate subtitles. (See: AI Subtitle)
- AI Summary: Analyzes the content to automatically generate a summary and key section (chapter) information. (See: AI Summary)
- AI Speed Enterprise : Processes the content to maintain clear audio quality without voice distortion during fast playback. (See: AI Speed)
- Encryption Enterprise : Applies Kollus DRM security to content so that only authorized users can play it. (See: Content encryption (DRM))
- Upload as audio Enterprise : Select this option when uploading a pure audio file, or when extracting and uploading only the audio track from a video file.
-
Starter
Basic
-
Select the upload location (category) where the content will be registered.
-
Drag and drop the file into the upload area, or click [Select file] to upload the file.
- File name emoji restriction: Files with emojis in the file name cannot be uploaded.
- Supported file extensions: Only files with the following extensions can be uploaded. Unsupported file formats are automatically excluded from the upload list or fail to upload.
- Video:
.3gp,.asf,.avi,.dv,.flv,.webm,.m4v,.mov,.mp4,.mpeg,.mpg,.wmv,.3g2,.3gpp,.f4v,.m2v,.ogm,.ogv,.wm - Audio:
.aac,.flac,.m4a,.mp3,.ogg,.wav,.amr,.wma
- Video:
- Maximum number of uploads: You can select up to 20 files at a time.
Step 3: Monitor upload status
Click [Collapse] at the bottom of the upload window to view real-time status through the status window at the bottom right.
- Multitasking support: Even if you navigate to another menu in the console, you can check the upload progress status through the status window at the bottom.
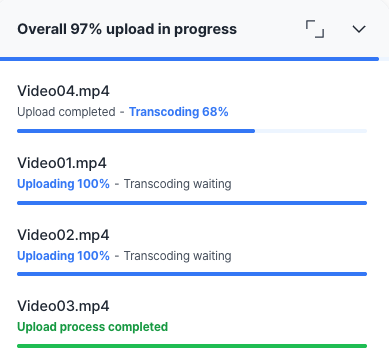
- Browser tab notification: The progress percentage is displayed in the title of the browser tab you are currently working in.

Step 4: Monitor transcoding status
Once uploaded, content is immediately registered in the library list and automatically enters the transcoding stage according to the configured encoding profile.
How to check transcoding progress
- The percentage (%) displayed over the poster image of the content in the library list
- The status window at the bottom right