Private Channel Service Flow
This document is a machine-translated draft and is currently undergoing review. Some content may be inaccurate or differ from the original Korean version. For the most precise information, refer to the Korean documentation.
This guide describes the entire process of operating a live stream through a private channel with security policies applied. If you want to configure a secure live stream that only authenticated users can watch, refer to the service flow below.
Core process summary
The technical transmission infrastructure of a private channel is the same as a public channel, but an additional security layer is added for viewing permission verification.
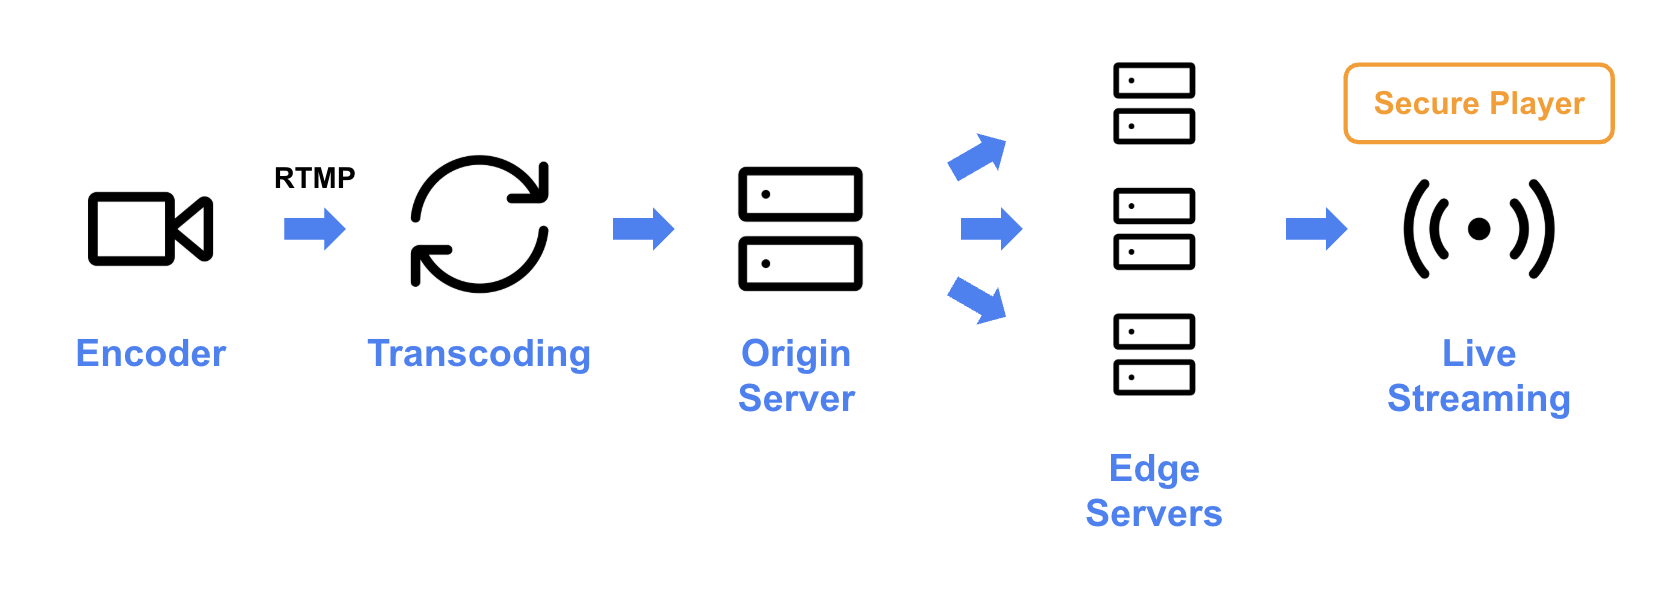
- Live Streaming (RTMP): The original video is transmitted to the server via RTMP(Real-Time Messaging Protocol) using the Kollus dedicated mobile encoder or broadcasting software such as OBS or vMix.
- Transcoding: The transmitted video is converted in real time to a quality and format optimized for the viewing environment according to the encoding profile preset in the Kollus Live console.
- Origin Server Storage: The transcoded content is temporarily stored on the Origin server in preparation for distribution.
- Edge Server Caching and Distribution: To handle large-scale concurrent access, content is cached on Edge servers and delivered to players via HLS(HTTP Live Streaming).
- Watching the Broadcast: Only authenticated users can watch the broadcast through the Kollus secure player.
Tutorial
Step 1: sign in to the Kollus Live console
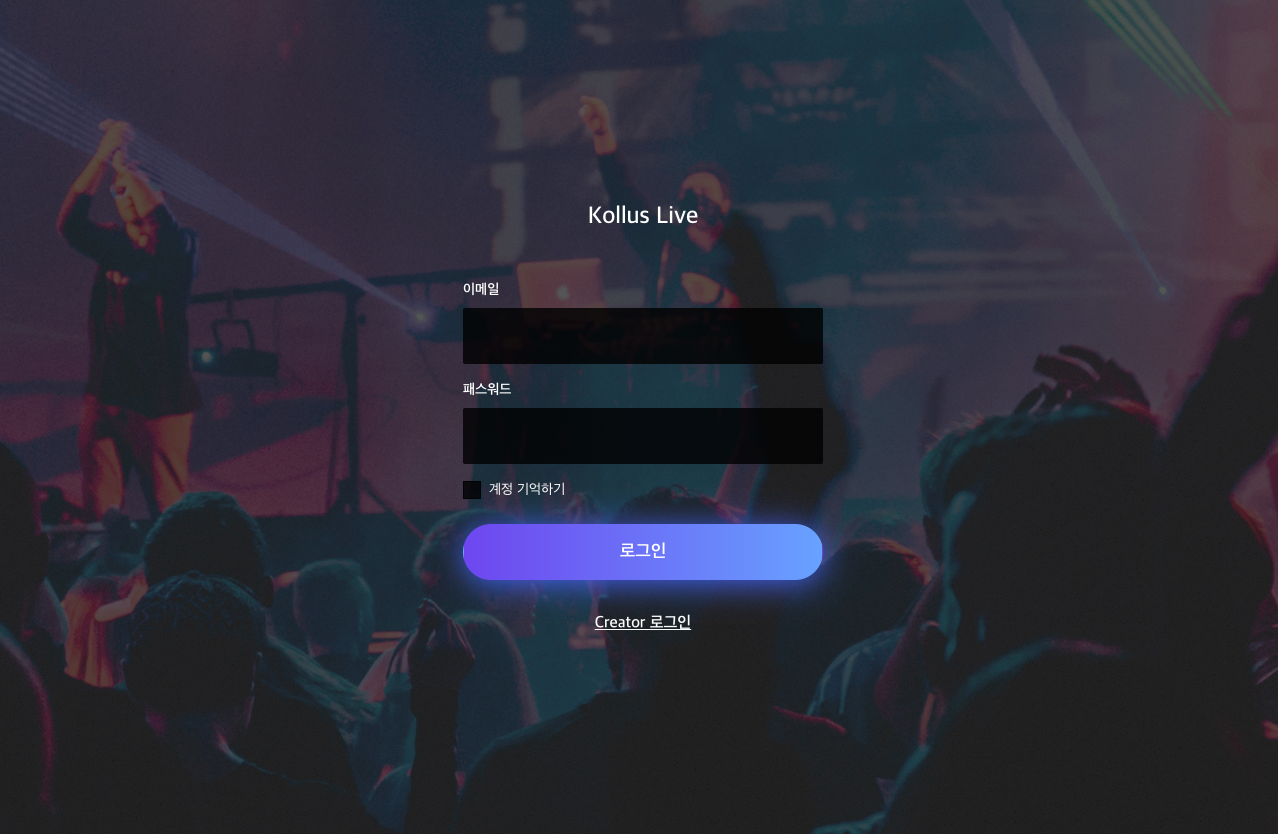
Go to Kollus Live Console and sign in.
- Integrated account: Enter the account information provided when the service contract was signed. If you are already using Kollus VOD, you can use the same sign-in credentials.
- Creator sign-in: This is a dedicated page for the 'host' who is in charge of actual live streaming. It can only be used after channel creation and Creator account registration are complete, so it cannot be accessed at this stage.
Step 2: create a live channel
Create a channel, which is the basic unit of a live stream. A channel converts(Transcoding) the original video in real time and distributes an optimized stream to users.
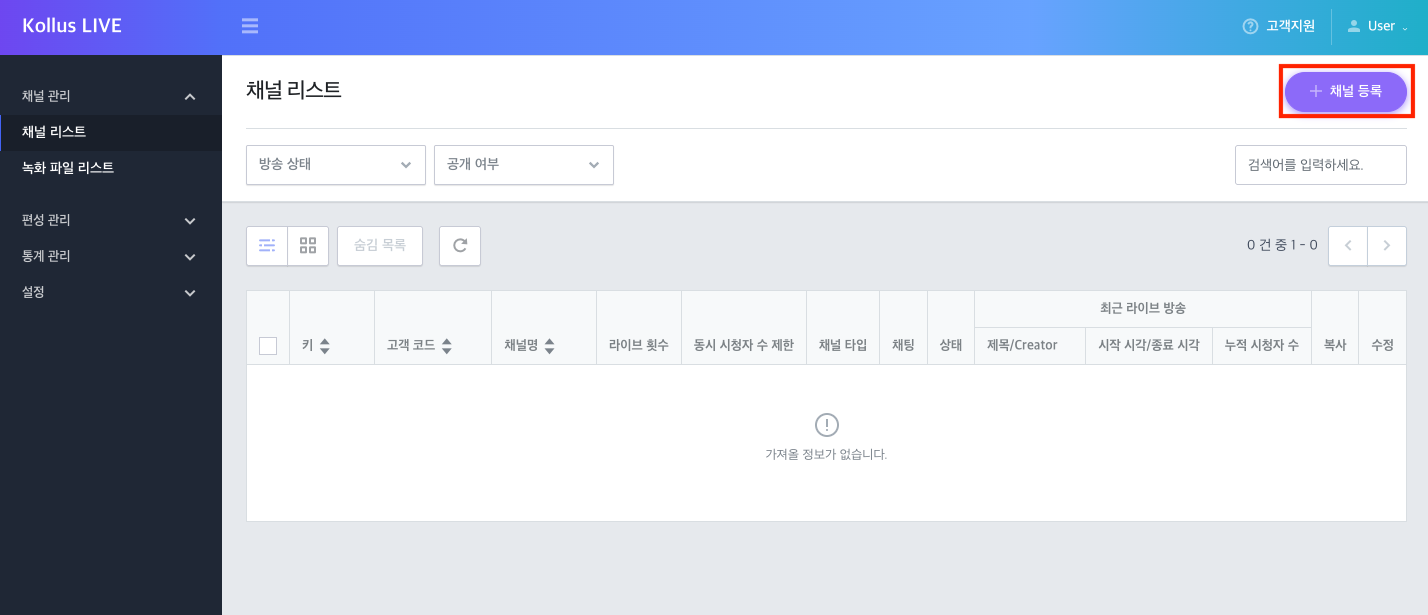
- In [Channel] > [Channel list], click [Register channel] in the upper right corner.
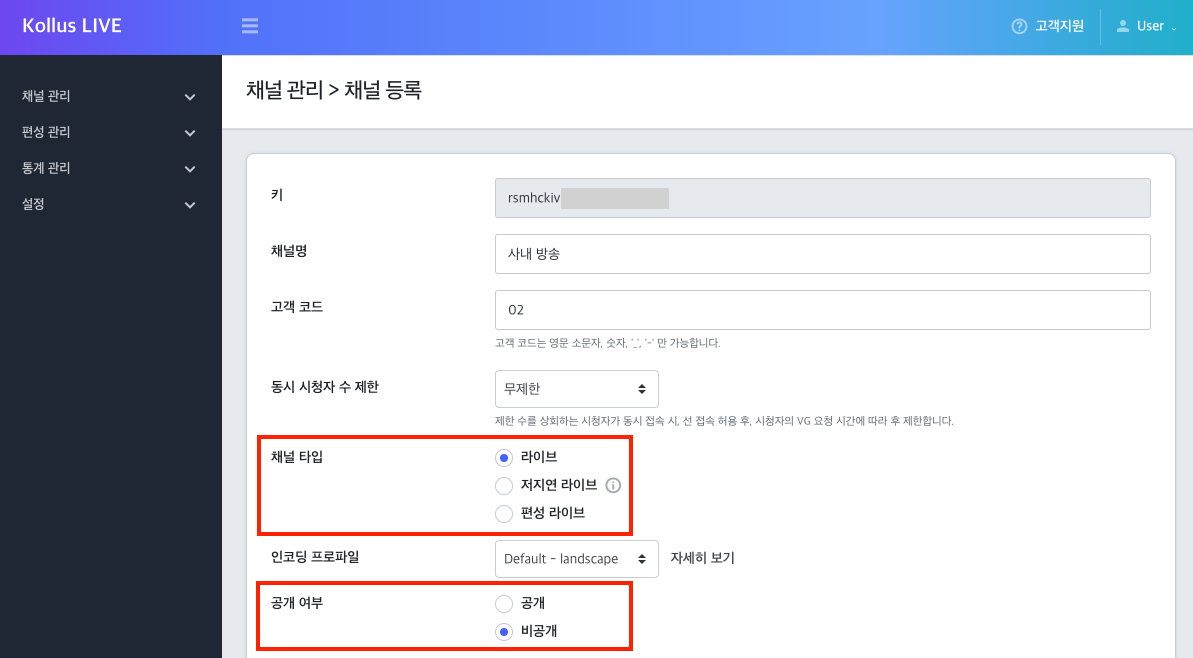
- Configure each item and click [Save]. (Since this guide describes the general live stream procedure for a private channel, set [Visibility] to [Private] and [Type] to [Live].)
Item Description Key The unique identifier for the channel. It is a required value for generating broadcast URLs and other items. (Cannot be modified) Channel name The channel name displayed in the service. Used to identify channels on the channel list or analytics pages. Customer code An identification code entered directly by the customer for internal management purposes. Concurrent viewers limit Sets the maximum number of concurrent viewers who can access the channel. Type Select the live type. - [Live]: Standard real-time broadcast
- [Low Latency Live]: LL-HLS method with minimized latency (Learn More: Low Latency Live (LL-HLS))
- [Scheduled Live]: File Live that broadcasts prepared VOD files at a scheduled time (Learn More: Scheduled Live)
Encoding profile Sets the orientation (landscape/portrait) of the broadcast screen. - [Default - landscape]: Landscape orientation
- [Default - portrait]: Portrait orientation
Visibility Sets whether the channel is public or private. - [Public]: A broadcast URL (Video Gateway Link) for external distribution is provided.
- [Private]: A JWT(JSON Web Token)-based URL must be generated so that only authorized users can watch.
Learn MoreFor descriptions of detailed settings such as security beyond the basic items listed in the table above, refer to the document below.
Step 3: generate a JWT
A private channel does not provide a public gateway link. Therefore, to allow users to access, a JWT(JSON Web Token) issued on the server side must be used to authenticate individual viewing permissions.
Various security features such as video watermarking and access expiration date/time can be defined in the JWT Payload. The required Payload configuration for watching a broadcast on a private channel is as follows.
Basic JWT payload example
{
    "client_user_id": "{END_USER_ID}",
    "expire_time": 1893455999,
    "live_media_channel_key": "abcd1234"
}
| Option | Type | Description |
|---|---|---|
client_user_id | string | A unique ID that identifies the viewer. |
expire_time | integer | The validity period of the token(JWT). Access is blocked upon expiration.
|
live_media_channel_key | string | The unique identifier for the channel.
|
For detailed descriptions of JWT configuration, refer to the document below.
Step 4: configure the secure broadcast URL
Call the player using a secure URL (S-link) so that only authenticated users can watch the broadcast. Write the broadcast URL according to the specifications below.
For detailed descriptions of how to call the player, refer to the document below.
Broadcast URL specifications
https://v-live-kr.kollus.com/s?jwt={JWT}&custom_key={CUSTOM_KEY}
Parameter details
| Parameter | Description |
|---|---|
jwt | Authentication and security settings token (JWT generated in Step 3) |
custom_key | Custom key
|
Step 5: live streaming
Use an encoder solution to transmit the actual video to the Kollus server. Select the guide that suits your environment.
Step 6: broadcast monitoring and termination
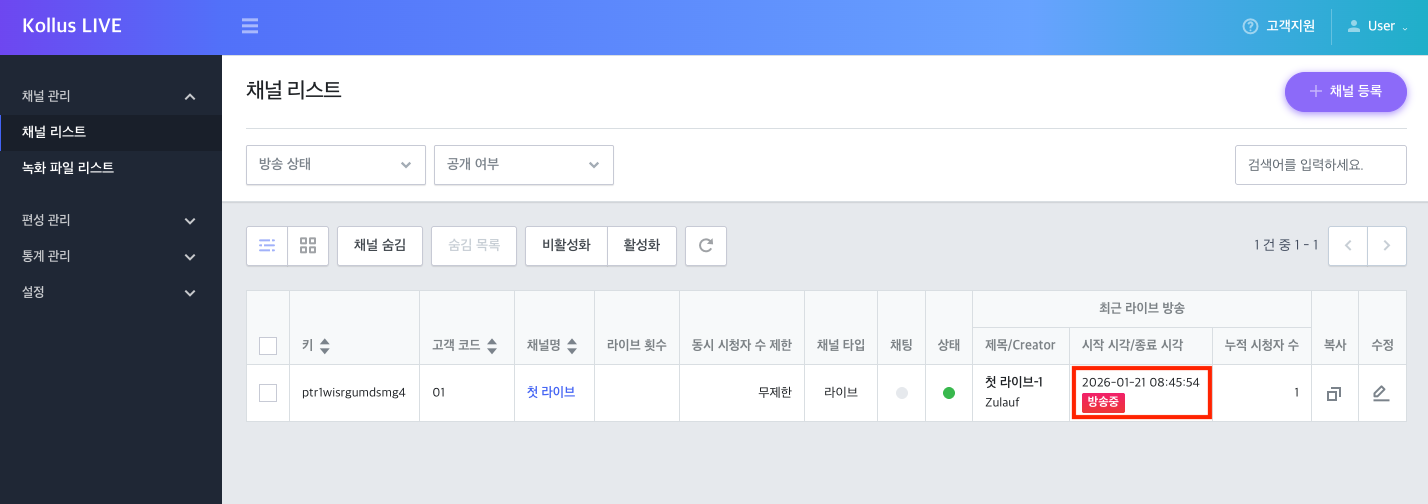
Once streaming starts, you can check the broadcast status in real time on the Kollus Live console.
- Check broadcast status: Check that the 'On Air' tag is displayed in the channel list.
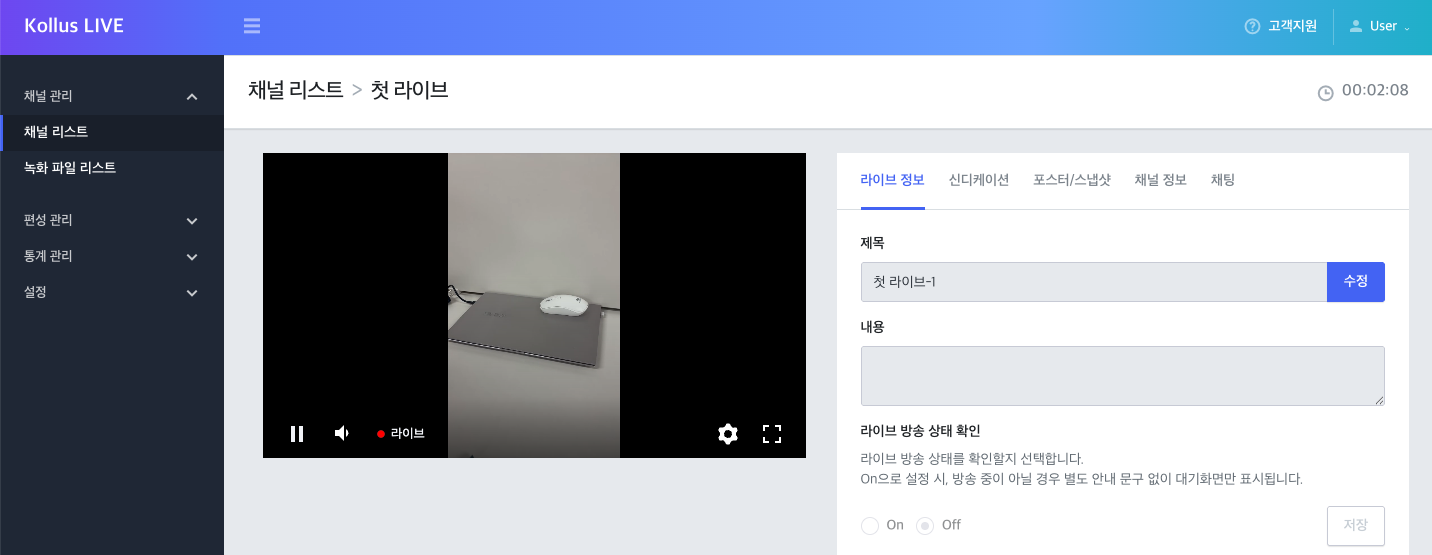
- Screen monitoring: Click the channel name to go to the channel details page, where the actual streaming screen is displayed in the player.
- End broadcast: Press the end broadcast button in the encoder program to terminate the broadcast.